
DIY Cork Coaster Hack

Well folks, it's getting close to that time of year again... BACK TO SCHOOL! In honour of the occasion I thought I would come up with a few simple DIY decor pieces to spice up dorm rooms and bedrooms that will also help you stay organized throughout the year. Today I'm sharing the first post in the series: a coaster hack that came in at a whopping $1.25 and took about 15 minutes to complete.
Materials:
- cork coasters (dollar store or ikea)
- acrylic paint
- paint brushes and or sponges
- tape
Instructions:
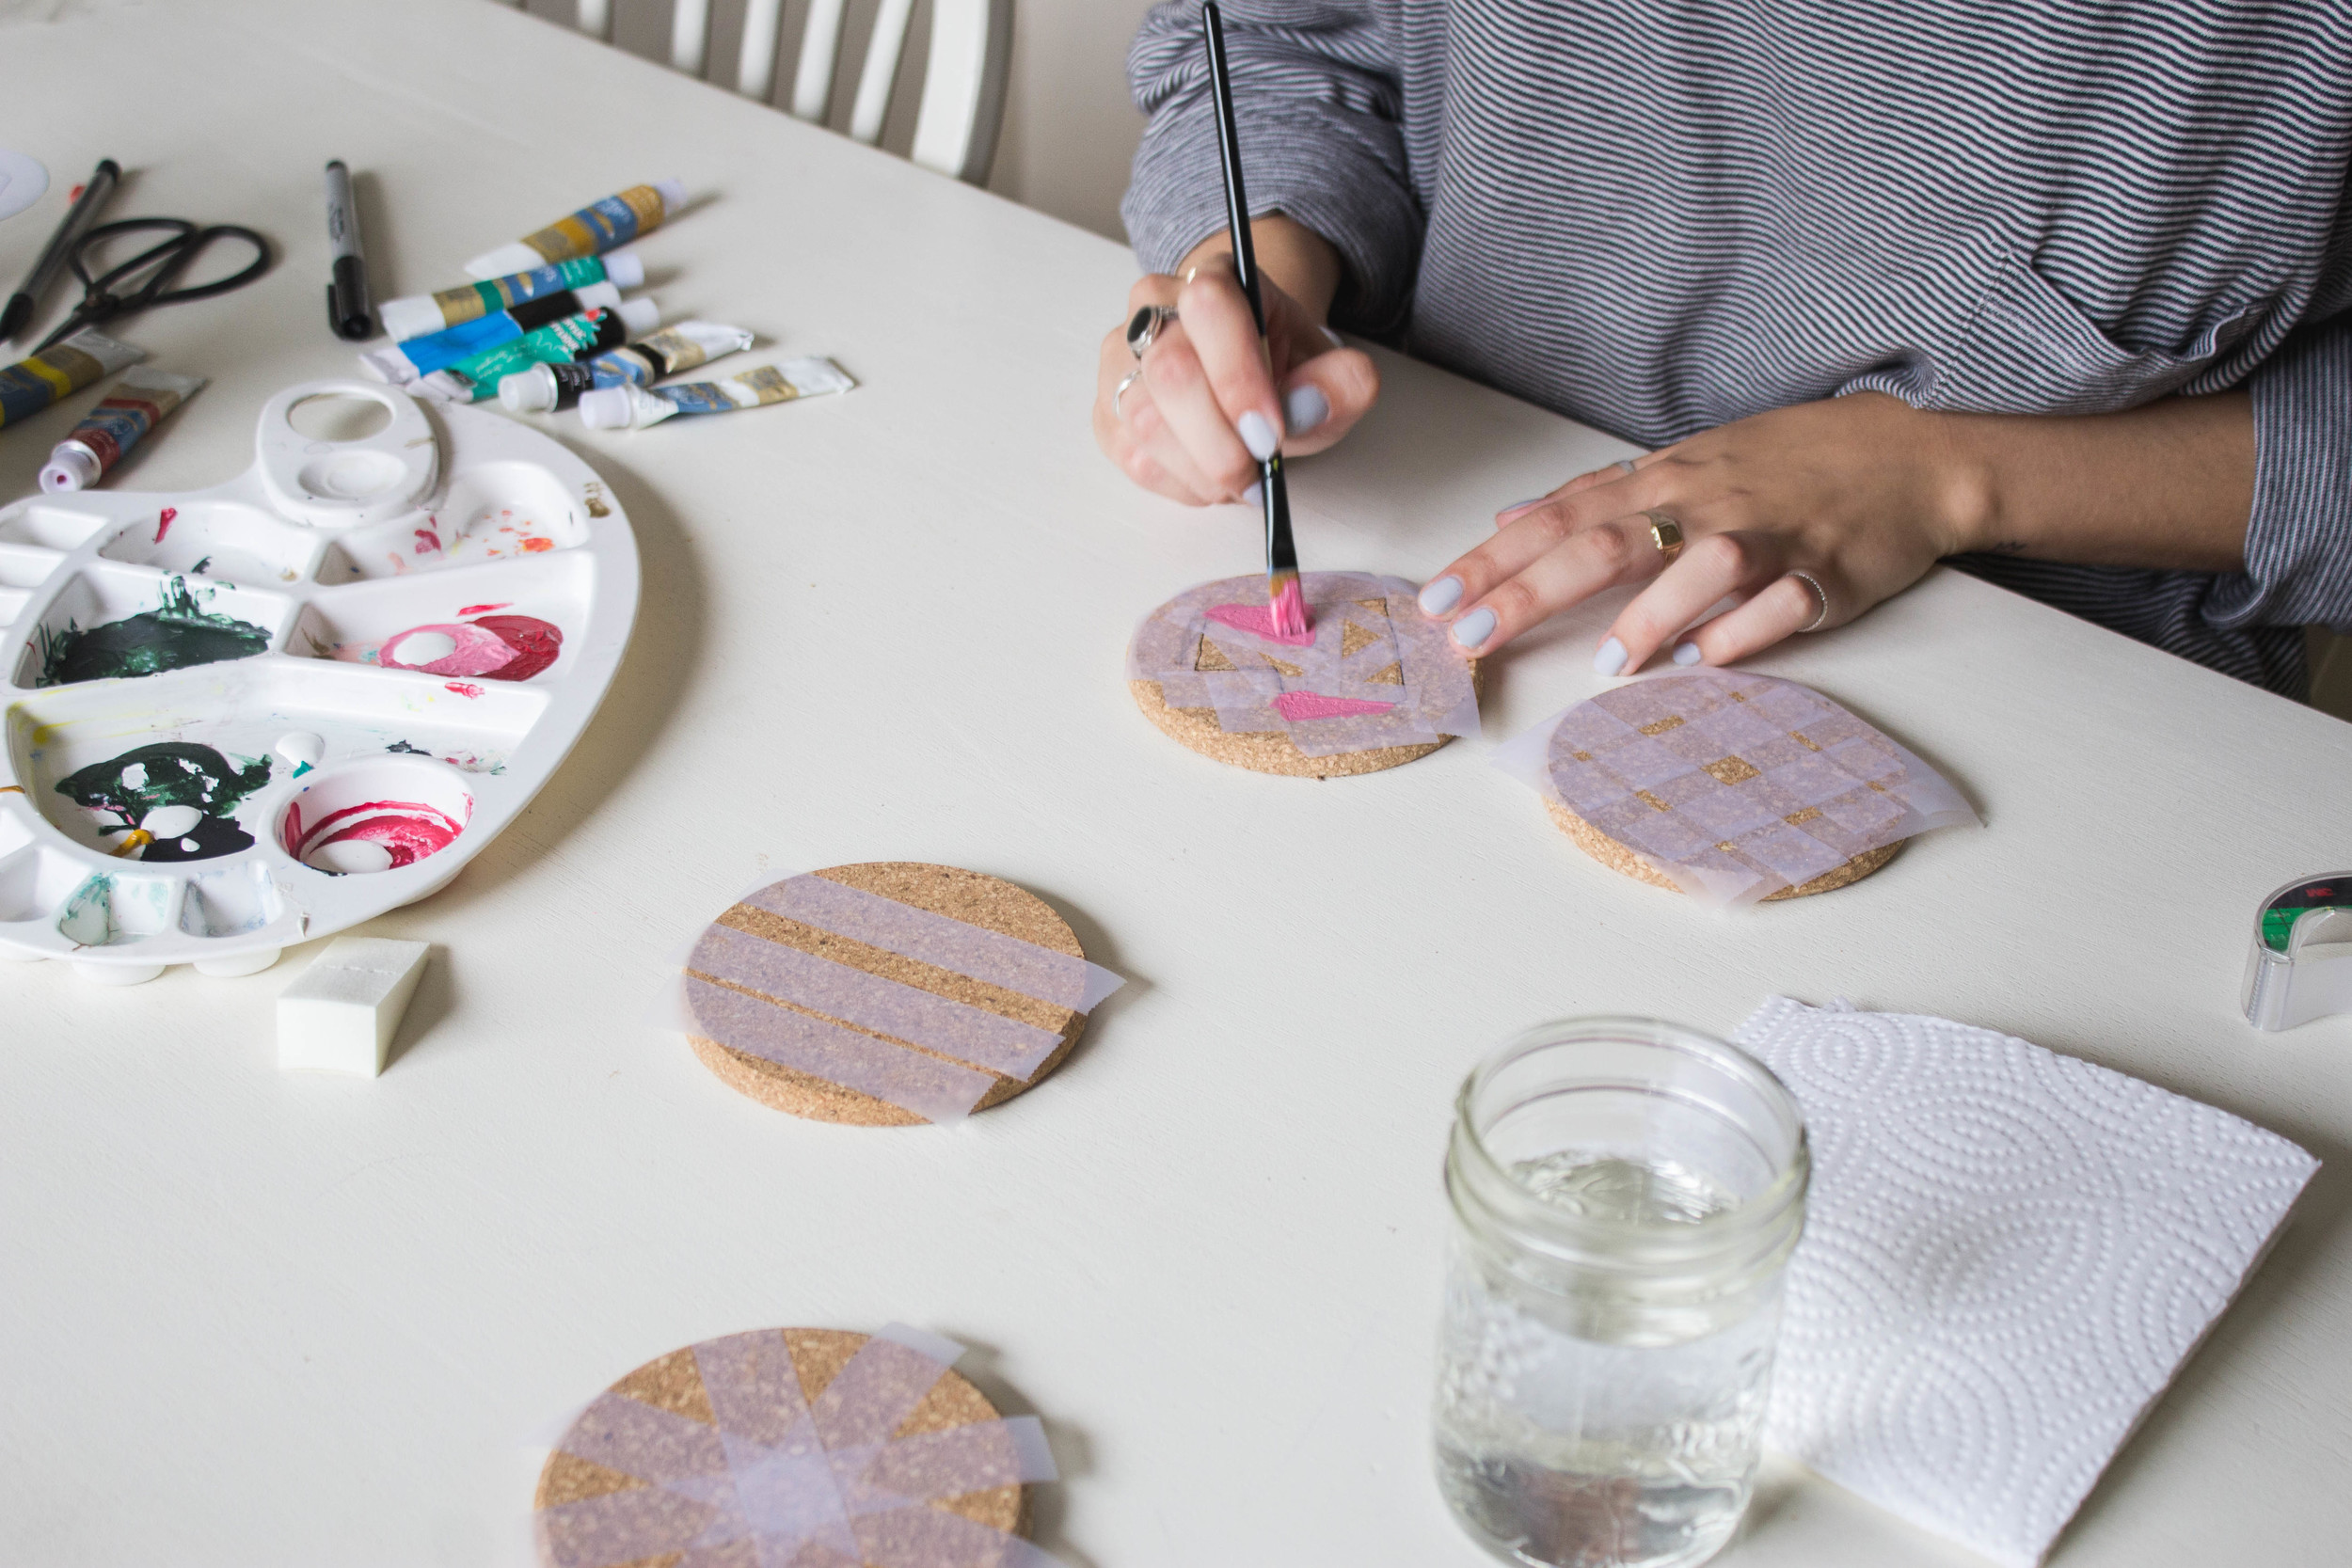
Step 1: Tape off your coasters in whatever designs you like. I went for a geometric heart, some triangles, stripes, and a grid-like pattern.

Step 2: Start painting! I recommend sticking to a color pattern of some sort to keep them looking like a set. I used bright colors just for something different but I think black, white, and grey ones would look awesome too.

Experiment with different techniques, too. I started with just the paint brush but when I wasn't happy with the grid-like pattern I used a sponge as a stamp to add more color and a different kind of texture.
Step 3: Let the paint dry completely then remove the tape. Once the tape has been removed, do any touch ups you want, let those dry, then hang them up!


The thing I love about this coaster hack is that they can be used three different ways: they can either be used as drink coasters (duh), wall art, or an organization system! How freaking functional!


Be sure to tag me or send me photos if you make these for yourself! Happy crafting!